
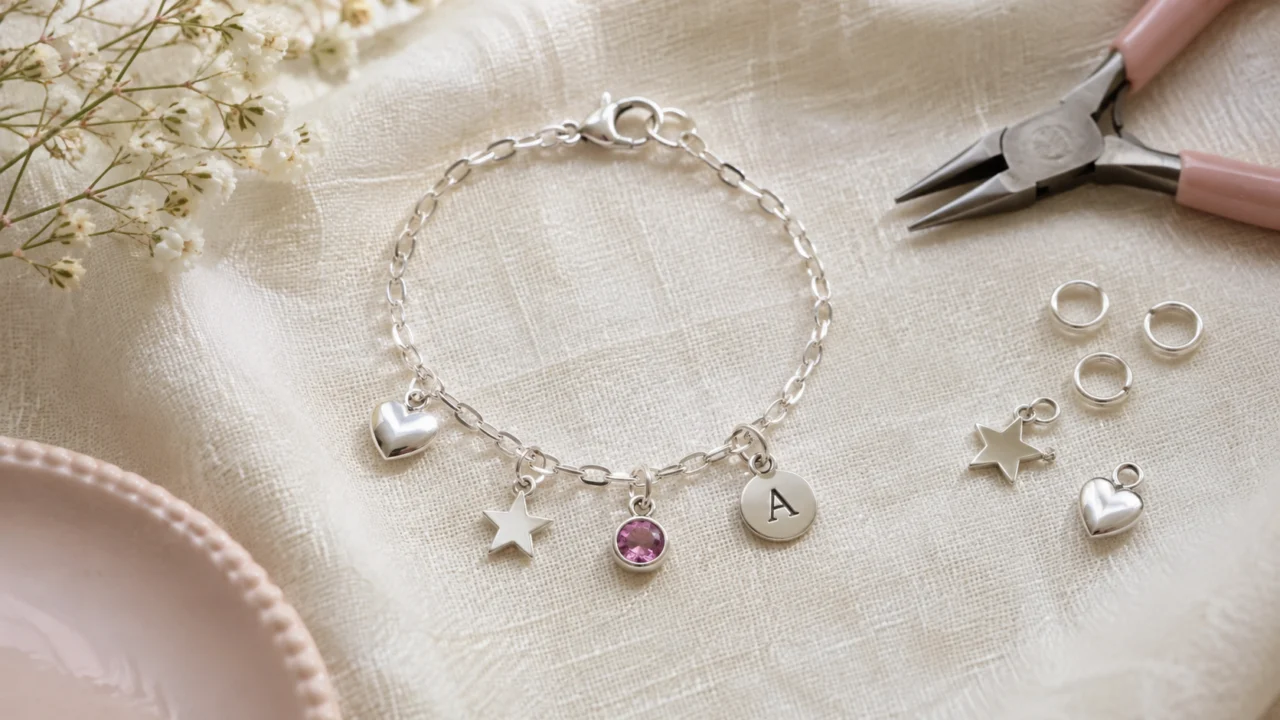
A charm bracelet is more than a pretty accessory. It’s a collection of meaningful little details, from initials and birthstones to symbols that represent favorite memories. The best part? You don’t need professional jewelry-making experience to create one.
If you want to build your own charm bracelet, you can start with a simple chain, a few charms, and basic jewelry tools. The process is surprisingly approachable once you understand how the pieces fit together.
This beginner-friendly guide covers everything from choosing your bracelet base and finding the right size to attaching charms securely and keeping your finished jewelry looking beautiful.
What Do You Need to Build Your Own Charm Bracelet?
Before you begin, gather your supplies. Starting with the right materials makes the process easier and helps prevent frustrating mistakes.
Here’s a basic charm bracelet supply checklist:
- Bracelet chain: A sturdy chain with links large enough to accommodate your charm attachments.
- Charms: Decorative pieces featuring initials, birthstones, hearts, stars, animals, or other meaningful designs.
- Jump rings: Small metal rings used to connect charms to the bracelet.
- Lobster clasp: A secure fastening mechanism if your chain doesn’t already have one.
- Two pairs of jewelry pliers: Chain-nose or flat-nose pliers for opening and closing jump rings.
- Jewelry cutters: Suitable cutters for shortening compatible jewelry chain.
- Measuring tape: A flexible tape for checking wrist size and bracelet length.
For your first project, consider using a ready-made bracelet chain with an attached clasp. This eliminates a few assembly steps and lets you concentrate on arranging your charms.
You can also purchase a charm bracelet starter kit containing compatible components.
Step 1: Choose the Right Bracelet Base
Your bracelet base determines how the finished piece looks, feels, and functions.
Not every bracelet style works with every charm, so choose your foundation before purchasing decorative pieces.
Chain Charm Bracelets
Traditional chain bracelets are among the easiest options for beginners.
Their individual links provide attachment points for dangling charms, allowing you to adjust the arrangement as your collection grows.
Look for a chain with sturdy, accessible links. Very delicate chains may not support multiple heavy charms comfortably.
Bangle Charm Bracelets
Bangles offer a clean, structured appearance. Depending on their design, charms may hang from compatible loops or slide onto the bracelet.
Some bangles require specially designed charms or connectors, so check compatibility before buying.
Beaded Charm Bracelets
Beaded bracelets feature decorative beads and compatible charms threaded onto a cord, elastic, wire, or specialized bracelet base.
These designs can be attractive and colorful, but assembly depends on the system. Certain beads require specific hole sizes, spacers, or stopping mechanisms.
Beginner tip: For your first DIY charm bracelet, a medium-weight link chain with a lobster clasp is a practical choice because individual charms are relatively easy to attach and reposition.
Step 2: Measure Your Wrist for the Perfect Fit
A charm bracelet should feel comfortable without sliding too far down your hand.
To determine your size:
- Wrap a flexible measuring tape around your wrist, just below the wrist bone.
- Record the measurement without pulling the tape too tightly.
- Add approximately ½ to 1 inch, depending on your preferred fit and the number of charms.
- Check the resulting length against the bracelet’s sizing instructions.
For example, a wrist measuring 6.5 inches may fit a bracelet measuring approximately 7 to 7.5 inches, depending on its design.
| Wrist Measurement | Suggested Starting Length |
|---|---|
| 5.5 inches | 6–6.5 inches |
| 6 inches | 6.5–7 inches |
| 6.5 inches | 7–7.5 inches |
| 7 inches | 7.5–8 inches |
| 7.5 inches | 8–8.5 inches |
These measurements are starting points rather than universal sizing rules. Bulky charms, thick chains, and certain bracelet constructions may require additional room.
Remember that adding more charms can change how a bracelet fits, especially when the charms occupy space around the wrist.
Step 3: Pick Charms That Tell Your Story
Choosing charms is often the most enjoyable part of creating personalized jewelry.
Rather than selecting decorations randomly, consider starting with a theme.
Popular charm bracelet ideas include:
- Family and relationships: Initials, hearts, family symbols, and birthstones.
- Travel memories: Airplanes, landmarks, seashells, and compass designs.
- Hobbies and interests: Musical notes, books, flowers, sports symbols, and animals.
- Personal milestones: Graduation caps, meaningful dates, and celebratory symbols.
- Minimalist style: Small geometric shapes, stars, moons, and simple metallic accents.
You don’t need to fill the entire bracelet immediately.
Starting with three to five charms gives you enough variety to create an interesting design while leaving space for future additions.
Choose Compatible Charms
Before purchasing, inspect how each charm attaches.
Traditional dangling charms usually feature a loop that connects to a bracelet link using a jump ring. Some have a bail, which is a small connector through which a chain or ring passes.
Slider charms, clip-on charms, and beads designed for proprietary bracelet systems may require different bases.
Also consider each charm’s weight. A heavy charm can overwhelm a delicate chain, while several oversized pieces may make the bracelet uncomfortable.
Step 4: Arrange Your Charms Before Attaching Them
Before opening any jump rings, place your bracelet flat on a clean surface and arrange your charms beside it.
This allows you to experiment with different layouts without repeatedly adjusting the attachments.
For a balanced look, position your largest or most meaningful charm near the center of the visible bracelet section, then arrange smaller charms around it.
You can also try an asymmetrical design featuring charms of different sizes and shapes.
Pay attention to:
- Spacing: Leave enough room for the charms to move without constantly tangling.
- Weight distribution: Avoid concentrating several heavy charms in one small area.
- Color balance: Mix coordinating metals and gemstones thoughtfully.
- Visual variety: Combine simple shapes with more detailed designs.
If you enjoy a fuller bracelet, you can gradually add more charms. Just remember that too many dangling elements may become noisy, bulky, or uncomfortable during everyday activities.
Step 5: Attach Your Charms Using Jump Rings
This is the most important assembly step when you build your own charm bracelet with a traditional link chain.
A jump ring is a small metal connector with a narrow opening. When properly closed, it secures the charm to the bracelet.
How to Open a Jump Ring
Hold the jump ring with two pairs of jewelry pliers, positioning one pair on each side of its opening.
Gently twist one side toward you and the other away from you.
Never pull the ring’s ends straight apart. This can distort its shape and make it difficult to close securely.
How to Attach the Charm
- Open the jump ring using the sideways twisting motion.
- Slide the charm’s attachment loop onto the ring.
- Thread the same jump ring through your chosen bracelet link.
- Use the pliers to twist the ring back into its original position.
- Check that both ends meet tightly without a visible gap.
Repeat the process with your remaining charms.
Some charms arrive with their own securely attached connectors, while others require separate jump rings. Choose rings that fit both the charm loop and the chain link without forcing either component.
For valuable or heavier charms, professionally soldered connectors may provide additional security, although they make future rearrangement less convenient.
Step 6: Add or Check the Bracelet Clasp
If you purchased a finished bracelet chain with a clasp, you can skip the clasp installation and simply inspect the existing closure.
For an unfinished chain, a lobster clasp is a practical option.
Attach the clasp to one end of the chain using an appropriately sized jump ring. Then attach a compatible closed connector ring or clasp-receiving component to the opposite end.
Make sure the clasp opens and closes smoothly.
An extender chain is another useful addition. It provides multiple fastening positions, making it easier to adjust the bracelet’s fit.
For heavier or valuable bracelets, consider a suitable safety chain or secondary fastening mechanism.
Step 7: Inspect and Try On Your Finished Bracelet
Before wearing your bracelet outside, perform a final inspection.
Run your fingers carefully along the chain to check for sharp edges or poorly closed connectors.
Examine every jump ring and verify that no opening remains large enough for a charm to slip free.
Next, put the bracelet on and gently move your wrist.
Pay attention to how the charms hang and whether the bracelet twists, catches, or feels heavier on one side.
If the arrangement feels awkward, reposition a few charms rather than immediately adding more.
A comfortable bracelet should move naturally without constantly snagging on clothing.
Choosing the Best Materials for Your Charm Bracelet
The material you choose affects the bracelet’s appearance, maintenance needs, durability, and overall value.
Here are some common options:
| Material | Benefits | Considerations |
|---|---|---|
| Sterling silver | Classic appearance and suitable for everyday jewelry | Can tarnish and requires occasional polishing |
| Solid gold | Durable precious-metal option with lasting intrinsic value | Higher initial cost; softer alloys can scratch |
| Gold-filled | Thicker bonded gold layer than typical gold plating | Gold layer can still wear with prolonged use |
| Gold-plated | Affordable way to achieve a gold-tone appearance | Thin plating may wear away over time |
| Stainless steel | Often durable and relatively low-maintenance | Alloy composition and nickel content vary |
For an everyday charm bracelet, durability matters just as much as appearance.
Sterling silver is a popular choice for sentimental jewelry, while stainless steel can be practical for someone seeking a lower-maintenance option.
Gold-filled components offer another alternative when you want a gold appearance without purchasing a complete solid-gold bracelet.
Whenever possible, choose compatible components with similar durability and maintenance requirements.
If you have a metal sensitivity, check the specific alloy composition rather than assuming a material is hypoallergenic.
Common Mistakes to Avoid When Making a Charm Bracelet
Even a simple charm bracelet project can become frustrating if you overlook a few details.
Buying Incompatible Charms
Not every charm fits every chain, bangle, or beaded bracelet.
Check attachment dimensions and connector requirements before purchasing components.
Choosing the Wrong Bracelet Length
A bracelet that fits comfortably without charms may become tighter after adding several bulky pieces.
Measure carefully and account for your intended design.
Leaving Jump Rings Partially Open
Small gaps can allow charms to detach unexpectedly.
Always inspect your connectors after closing them.
Adding Too Many Heavy Charms
Excess weight can strain chain links, connectors, and clasps.
Choose a bracelet base appropriate for the weight of your decorations.
Ignoring Everyday Comfort
Large dangling charms may catch on sweaters, desk edges, or bags.
For frequent wear, consider smaller charms with smooth edges.
How to Care for Your Handmade Charm Bracelet
Once you’ve finished making your bracelet, proper maintenance can help preserve its appearance.
Remove it before swimming, showering, or using household cleaning products, particularly if it contains plated components, pearls, porous gemstones, or other delicate materials.
Avoid spraying perfume, hairspray, or lotion directly onto the jewelry.
After wearing, gently wipe appropriate metal surfaces with a soft, clean cloth to remove skin oils and residue.
Store your bracelet in a dry jewelry pouch or compartment to reduce scratching and tangling.
For sterling silver, use a polishing cloth designed for silver when necessary. Avoid aggressive polishing on plated finishes, as it can remove the decorative layer.
Gemstones, pearls, adhesives, and specialized finishes may require different cleaning methods. Follow the care guidance provided for your particular components.
Periodically inspect jump rings, clasps, and chain links, especially if you wear the bracelet frequently.
Creative Charm Bracelet Ideas for Beginners
Once you understand the basics, you can experiment with different styles.
A birthstone bracelet can represent loved ones or important dates. An initial bracelet offers a simple way to personalize everyday jewelry.
A travel-inspired bracelet can grow with each new destination, while a friendship bracelet might feature coordinating symbols shared between two people.
For a thoughtful handmade gift, choose a theme connected to the recipient’s interests. A bracelet featuring a favorite flower, initial, or meaningful symbol often feels more personal than one filled with unrelated decorations.
You can also mix silver-tone and gold-tone charms for a contemporary look, provided the metals and connectors are compatible.
The beauty of a charm bracelet is that it doesn’t need to be finished all at once. Leaving room for new charms allows the design to evolve with your experiences.
Frequently Asked Questions
Can beginners make their own charm bracelets?
Yes. A simple chain charm bracelet requires only a few basic supplies and beginner-level techniques. Using a ready-made bracelet chain and charms with attachment loops makes the process especially approachable.
How many charms should I put on my first bracelet?
Three to five charms is a practical starting point. The ideal number depends on charm size, bracelet length, overall weight, and your preferred appearance.
Can I add charms to an existing bracelet?
Usually, yes, provided the charms and attachment methods are compatible with the bracelet. Some branded systems require specifically designed charms or connectors.
Can you make a charm bracelet without jewelry pliers?
You can use a compatible clip-on charm system or a bracelet designed for slide-on charms. Traditional jump-ring assembly is generally easier and more secure with suitable jewelry pliers.
Can I mix gold and silver charms on one bracelet?
Yes. Mixed-metal charm bracelets can look attractive, especially when the different tones are distributed throughout the design. Consider component compatibility, potential surface wear, and the different cleaning needs of each metal.
Create a Charm Bracelet That Feels Personal
Learning to build your own charm bracelet is a rewarding introduction to jewelry making. With a comfortable bracelet base, compatible charms, and carefully secured connectors, you can create a piece that reflects your personality or celebrates someone special.
Start with a few meaningful charms, give each one room to stand out, and inspect your attachments before wearing the bracelet. As your collection grows, you can rearrange or add charms to mark new memories.
The most meaningful charm bracelets aren’t necessarily the most elaborate. They’re the ones filled with details that matter to the person wearing them.